Posting an Invoice
This guide walks through the step-by-step process of posting invoices in ChainDrive.
Prerequisites
Before starting the invoice posting process, ensure you have:
- Access to the ChainDrive Accounting module
- Appropriate user permissions for posting invoices
- The physical or digital invoice ready for processing
- A supplier setup for the invoice you are posting
Make the setup screen look like this
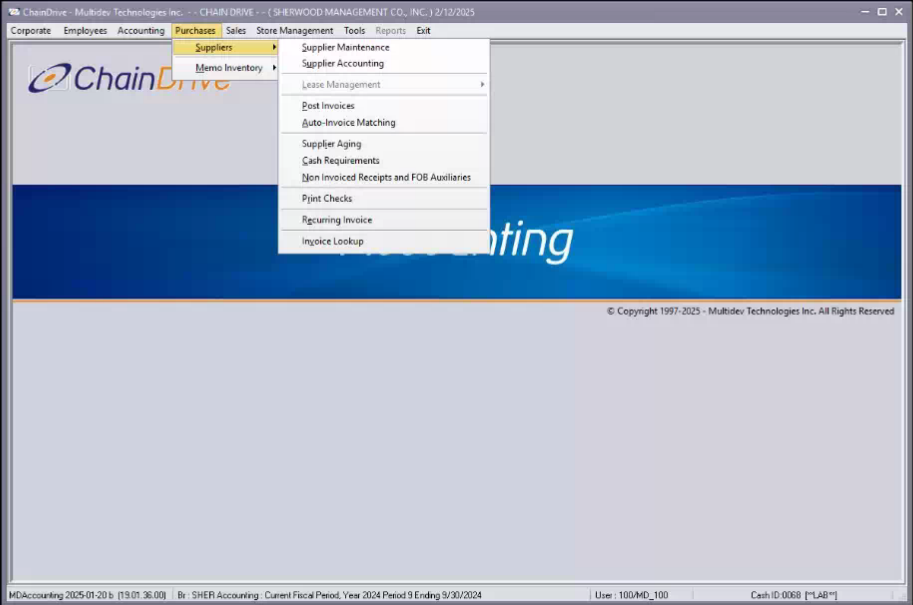
Accessing the Invoice Entry Screen
- Log into ChainDrive using your credentials
- Navigate to
Purchases→Suppliers→Post Invoice
Creating a New Invoice
Step 1: Create Invoice Header
- Click the
+button in the top toolbar. This will create a new invoice header. - Select the supplier. You can search for suppliers using the
...button. In the search box you can search by supplier id (SUPPID) or by supplier name in the search by drop down.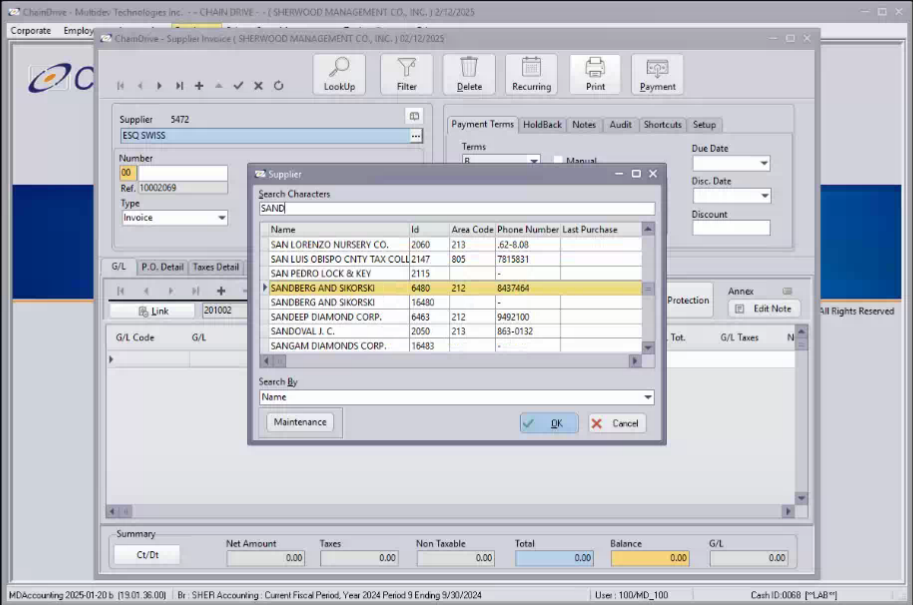
Captilization matters if searching by name.
- Enter the suppliers invoice number in the blank field immediately underneath number.
- The data of entry and other fields can be left alone unless an invoice should be recorded as entered at an earlier or later date. The status can be left as TBA for pending approval.
- The record can now be saved by pressing the ✓ in the toolbar to save the record.
- The payment terms will update with the suppliers default payment terms including due and discount dates. These can be modified directly. If the due date needs to be changed the checkbox next to Manual must be checked. Similarily, if applicable holdbacks may be set in the
HoldBacktab. - If any updates were made the must be saved.
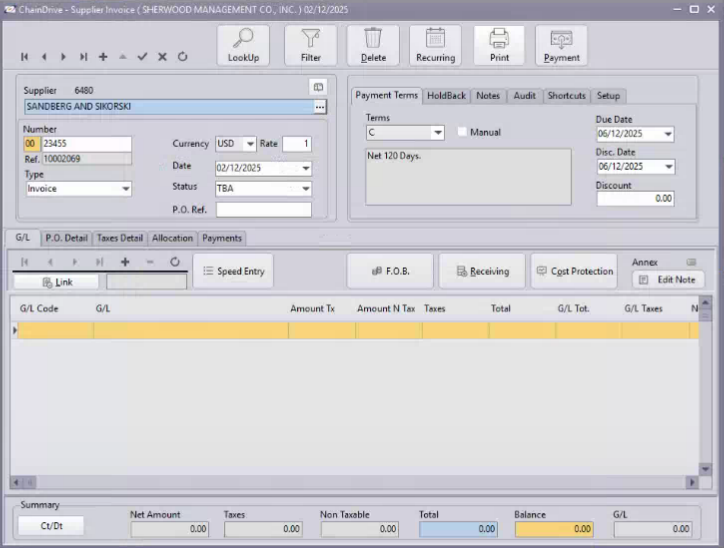
Step 2: Enter Invoice Line Items
You can enter line items using either the regular method or speed entry method. Generally the speed entry method is needed when you will be entering multiple lines that should be assigned different allocations.
Regular Method
For each item on the invoice that should have a separate allocation:
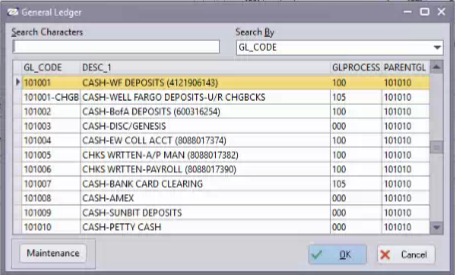
- Click
+or pressF7. You'll be prompted to select the appropriate GL code and can search by code or process by changing the search by option. Select the appropriate instance and pressOK.
-
After selecting the appropriate coding, you'll be prompted to provide the Invoice Detail for the line. The amount must be entered in the taxable or non taxable line. Once entered press
Calculate. The tax detail section can have a record added with the+button and filled out but this is unusual since we typically don't allocate taxes to a different account. -
In the distribution section, press the
+button and complete record which contains the Branch, Department, Amount, and G/L. UseTabto navigate out of the line and pressOKto post. Additional lines may be added using this method.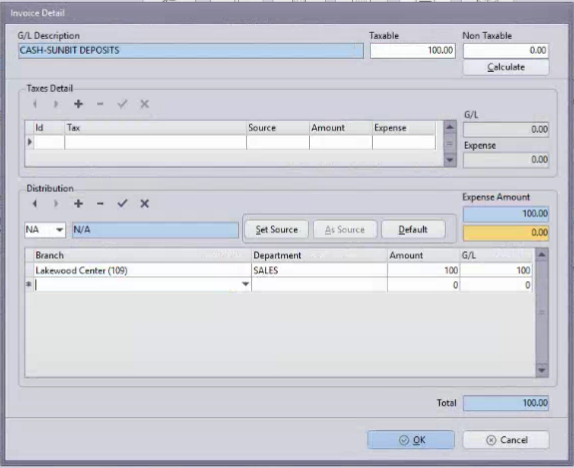
Speed Entry
- Press the button labeled
Speed Entry.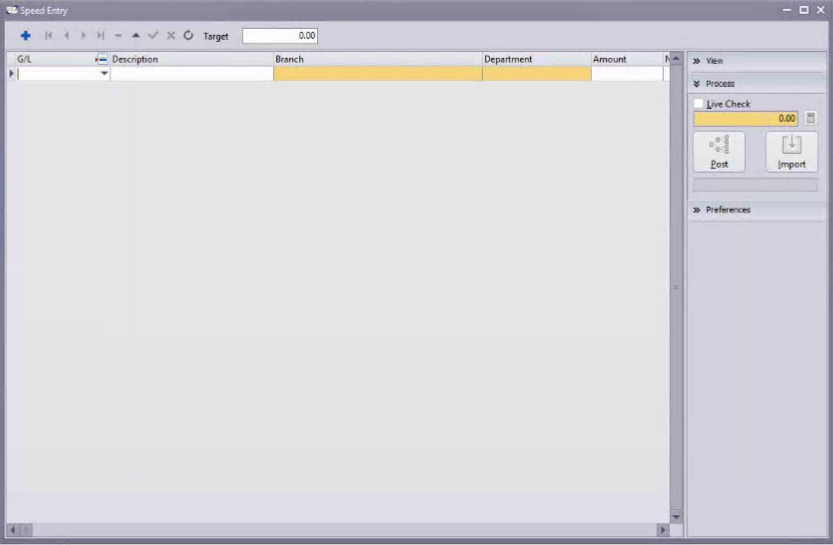
- Enter the total of the invoice that needs to be allocated in the
Targetfield at the top of the new window. This will be used to distribute the amount to new entries such that they balance. - Press
Tabuntil in theG/Lfield. Enter the apopropriate G/L code. You must enter the code. If you do not know the code by number you can search for it by press the icon in the G/L header field to search. - Press
Tabto navigate to Branch and complete the field, do the same for Department, Amount, and Note (if applicable). - On pressing
Tabat the end of the line a new line will be created. This can be further completed. - Once completed the
Postbutton can be pressed to create the invoice lines.
After allocating and saving the line by either method the invoice will show up for payment in a a checkrun. After marking the invoice as approved it will post to the GL. If it is marked as approved at entry it will post to the GL.
Entering via Import
- Press the button labeled
Speed Entry. - Press the
Importbutton. A new menu will appear asking you to specify the details of your import.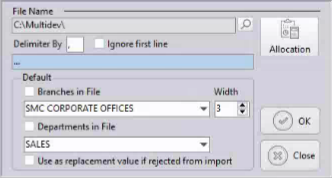
- The import allows for the creation of entries from a delimited file. Generally this should be done from excel and the file saved as a CSV. This will include the header when saved so the box
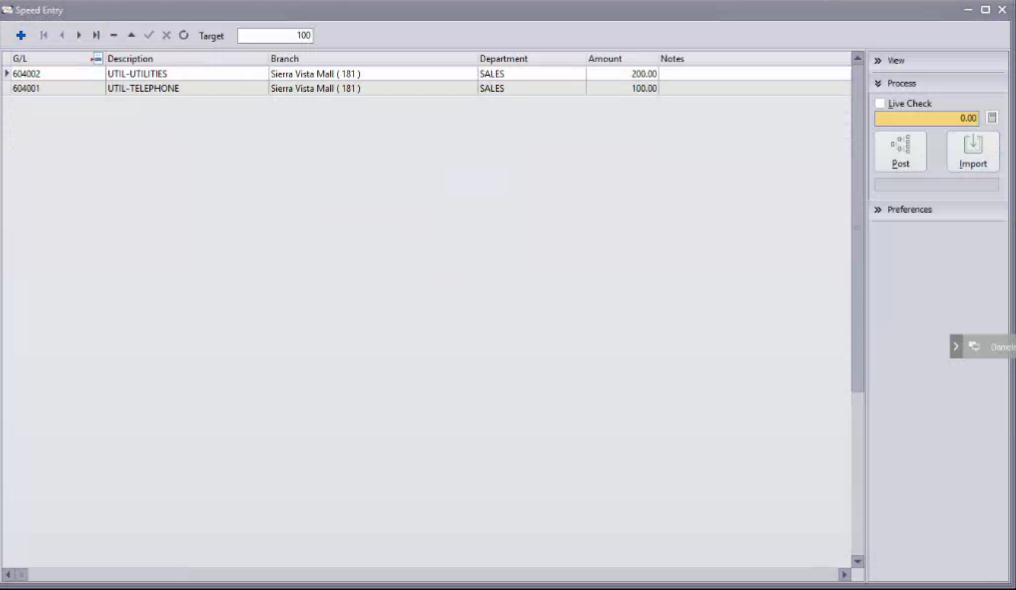
Ignore first lineshould be checked. A table in excel should look exactly as follows. The oprdering must match, but the column names may be different:
| G/L | Branch | Department | Amount |
|---|---|---|---|
| 604002 | 181 | SLS | 200 |
| 604001 | 181 | SLS | 100 |
When saved to a file it should be given a descriptive name and saved as a CSV. The underlying data in the CSV will look like:
G/L,Branch,Department,Amount
604002,181,SLS,200
604001,181,SLS,100
'
As the file is specifying the Branch and Department the boxes Department in File and Branches in File need to be checked. After specifying the file and the appropriate boxes checked the file may be imported by pressing the OK button, and the entries will be created. If they are not checked but are specified in the file the Branch will be used as the amount and result in an error.
- Review the created entries for errors. It's possible to perform another import of a different file to create additional lines if needed.
- When all lines have been created press
Postto confirm the lines and complete entry
Importing without Branches in File or Departments in File checked and specifying a default is possible, but the columns should not exist in the importing file.
The following shortcuts are available to speed up usage
| Shortcut | Function |
|---|---|
| F5 | Invoice Insert |
| F6 | Invoice Edit |
| F7 | Insert Detail |
| F8 | Speed Entry |
| F9 | Save Changes |
| F3 | Corrective Debit/Credit |
| F10 | Cancel Invoice Insert/Edit |
| F4 | Manual Discount Yes/No |
Things to update. I need to link